


%20Data%20in%20GA4.webp)


In our latest blog post, we provided enhanced guidance on setting up Google Analytics 4 (GA4). We focused on delivering a more comprehensive approach to creating a GA4 account and property, aiming to address the significant changes that have occurred since the legacy version of Google Analytics was retired in 2023.
In this blog, we’ll explore a refined method for setting up Google Tag Manager, incorporating the latest best practices and enhancements. This updated guide will help you have the most current and actionable insights for optimizing your tag management setup. Whether you’re new to GTM or just looking to improve how it’s set up, this guide will walk you through everything step by step.
But before diving in to the actual set up, let’s first take a look at what Google Tag Manager is and why it is important.
What is Google Tag Manager and Why is it Important?
Google Tag Manager (GTM) is a free tool provided by Google that helps marketers, analysts, and developers manage and deploy marketing tags (small snippets of code) on their website or mobile app without needing to modify the underlying codebase. These tags can serve various purposes, such as tracking user behavior, integrating third-party tools, or firing conversion pixels for ad platforms like Google Ads and Facebook.
In essence, when you need to track website interactions that Google Analytics 4 (GA4) doesn’t capture by default, a Tag Management System (TMS) becomes your go-to solution. TMS tools act as a bridge between your website and various tracking platforms, enabling you to easily implement and manage custom tracking.
There are several robust TMS options available, such as Tealium, Adobe Launch, and Segment, each catering to different business needs. However, our top recommendation is Google Tag Manager (GTM).
The hierarchy in Google Tag Manager (GTM) follows this structure:
- Account:some text
- The highest level in the hierarchy.
- Represents your organization or company.
- Can contain multiple containers.
- Container:some text
- Represents a specific website or app.
- Holds all the tags, triggers, and variables related to that particular website or app.
- Workspace:some text
- A temporary space within a container where you can edit, test, and preview changes before publishing them live.
- Allows for collaboration and version control.
- Tags: Pieces of code (e.g., Google Analytics, Google Ads conversion tracking, Facebook Pixel) that collect data or trigger actions on your website or app.
- Triggers:some text
- Rules that determine when a tag should fire.
- Examples: Page view, click, form submission, scroll depth.
- Variables:some text
- Dynamic values that can be used within tags and triggers.
- Examples: Page URL, click ID, user ID, custom variables.
In essence:
- You have an Account that encompasses all your websites or apps.
- Within each Account, you have a Container for each specific website or app.
- Within each Container, you create and manage Tags, Triggers, and Variables to track and collect data.
How Does GTM Work?
At its core, GTM acts as a container that holds all your tags in one place. Instead of adding tags directly to your website's code, you add them to GTM. A single GTM script is placed on your site, and it takes care of firing the right tags at the right time. This means you can make updates or add new tags without constantly involving your development team, saving time and reducing errors.
Why is Google Tag Manager Important?
- With GTM, you don’t need to rely on a developer every time you want to add or update a tag. This makes marketing campaigns faster and more agile.
- GTM provides a preview and debug mode, which allows you to test your tags before they go live. This reduces the risk of errors, ensuring that your tracking works as expected.
- GTM works seamlessly with Google products like Google Analytics and Google Ads. It also supports third-party tools, giving you the flexibility to use your preferred platforms.
- By centralizing tag management and simplifying the process, GTM reduces the back-and-forth between marketing and development teams, freeing up resources for other priorities.
- Whether you’re a small business running simple campaigns or a large organization with complex tracking needs, GTM scales with you. Advanced users can create custom tags, triggers, and variables for more sophisticated tracking.
In summary, Google Tag Manager allows you to take control of your digital marketing and analytics setup. Making it easier to manage tags and track user interactions.
Create Google Tag Manager Account and Container
1. Access Google Tag Manager
- Open your web browser and go to the Google Tag Manager website: https://tagmanager.google.com/
2. Sign In
- Sign in to your Google Account. If you don't have one, you'll need to create one.
3. Create an Account
- Click the "Create Account" button.
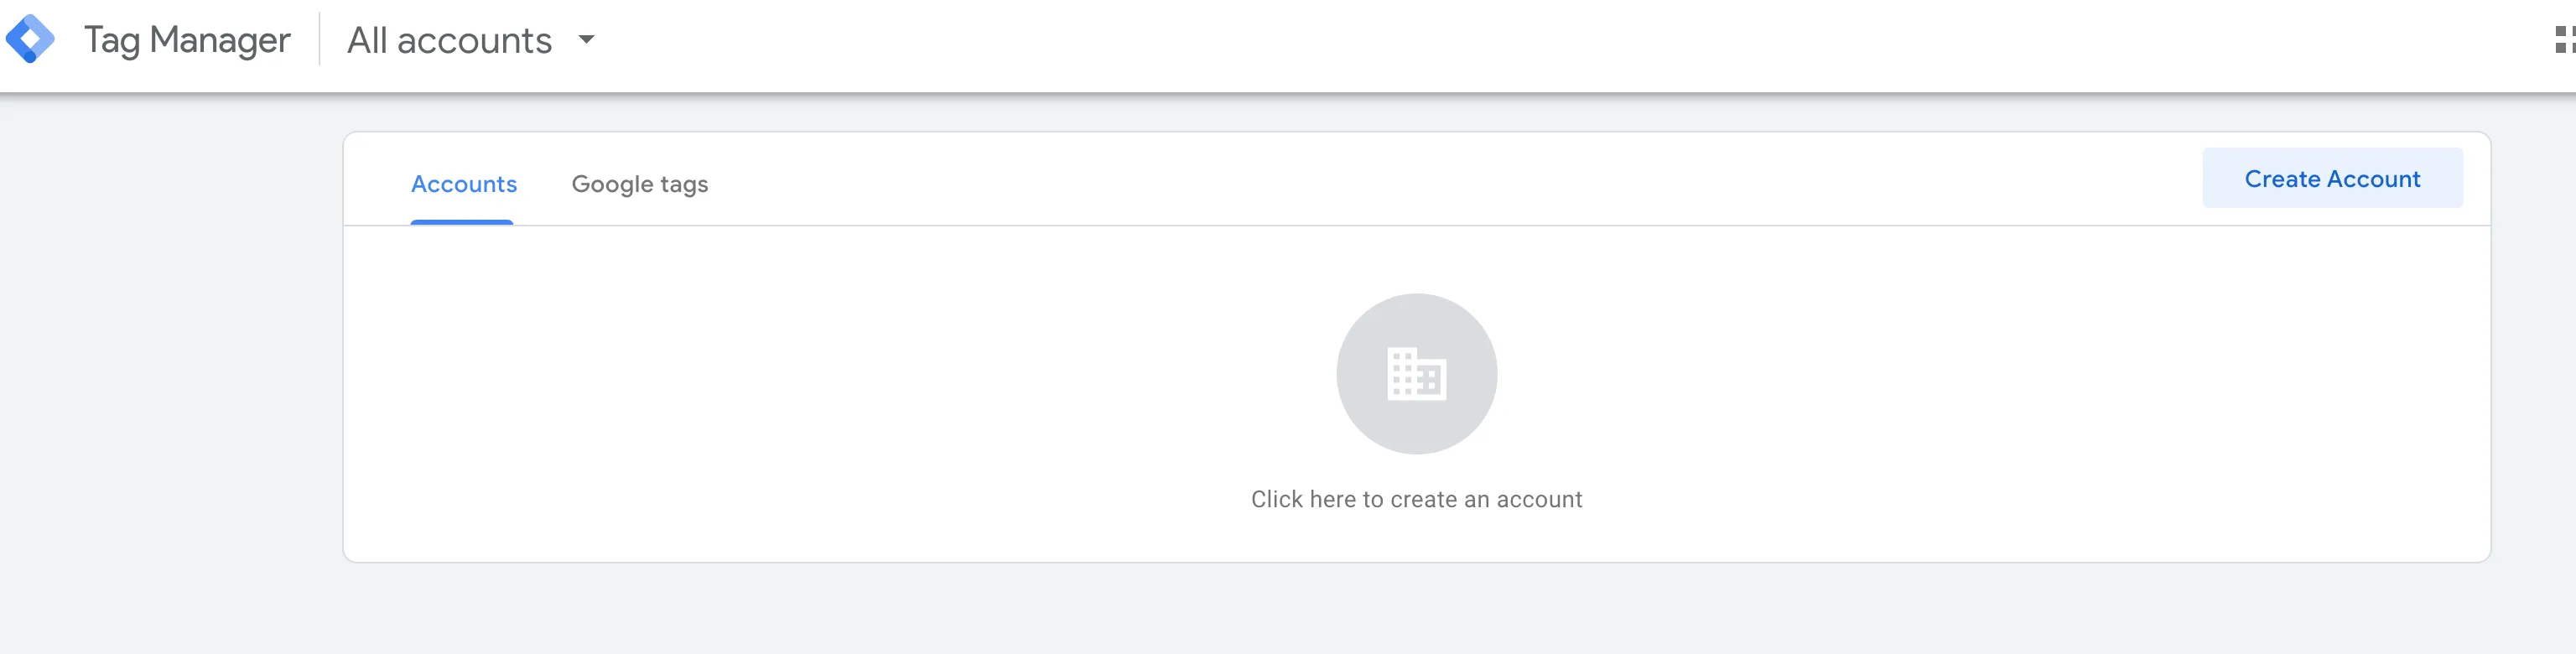
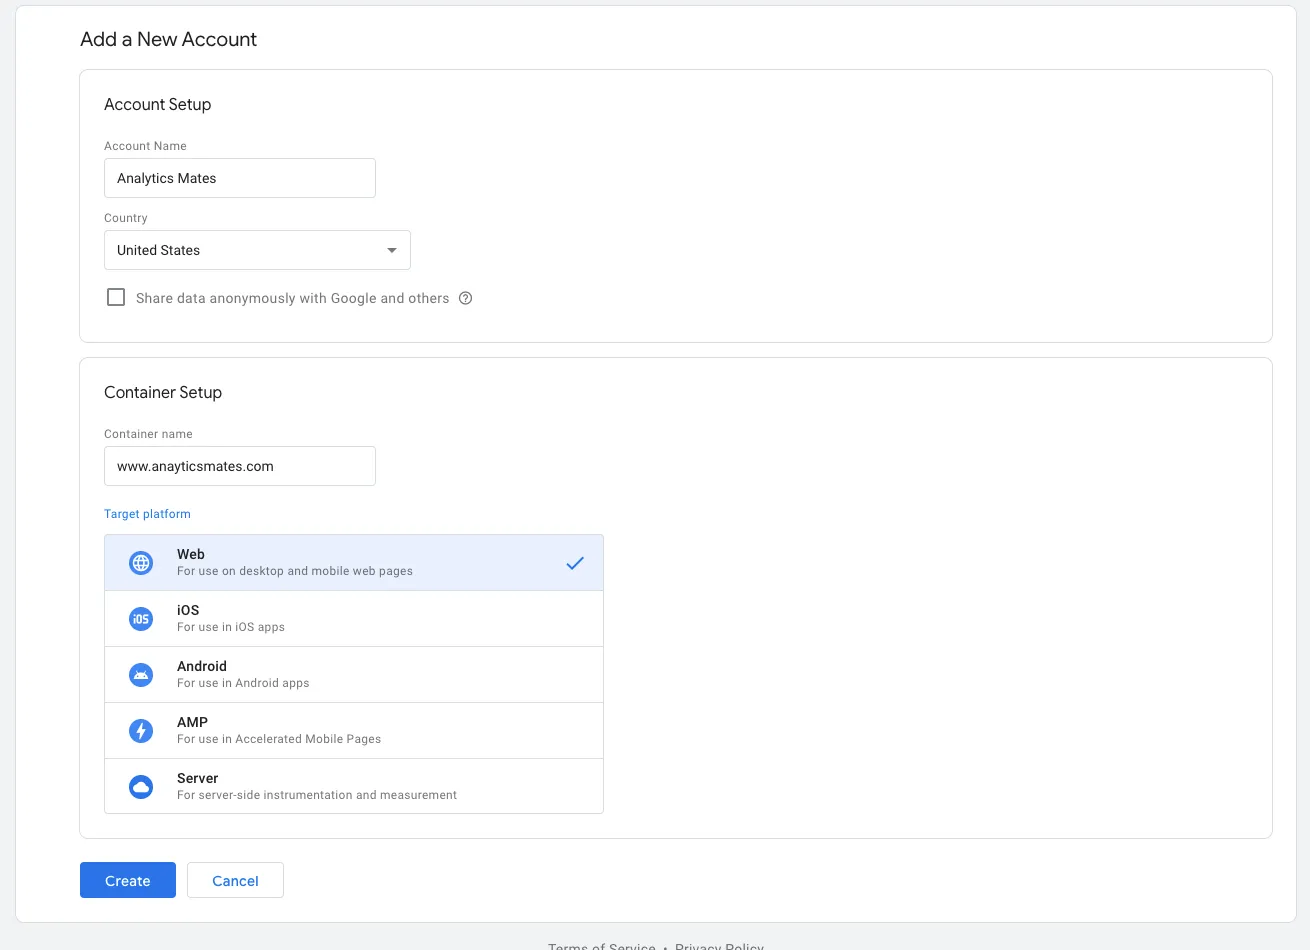
- Enter an Account Name. This is usually your company name or a general name for your organization.
- Select your Country/Region.
- Optional: Check the box to "Share data anonymously with Google and others to enable benchmarking." This helps Google improve their services.
- Click "Create."
- Next, the Google Tag Manager Terms of Service Agreement will be presented. Simply click “Yes” to accept the terms, and don’t forget to check the box confirming your agreement to the Data Processing Terms, as required by GDPR compliance.
- Once you agree to the terms, you’ll be redirected to a newly created Container and Workspace. Also a pop up of an installation steps to your website.

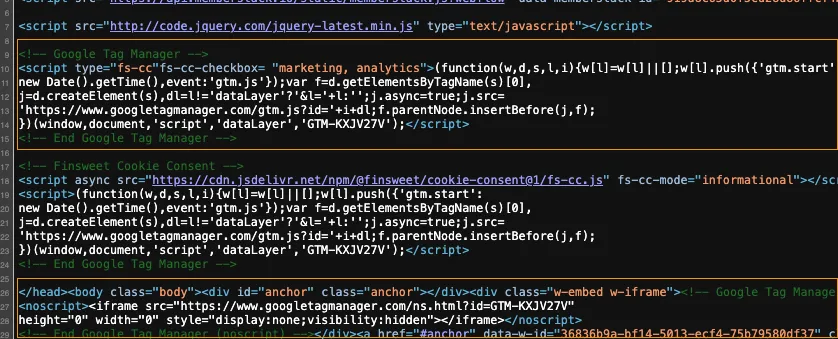
4. Install the GTM Code
- You'll be presented with two code snippets. Follow the instructions on how to install these code snippets correctly. This usually involves adding them to the <head> section of your website's HTML code and adding the other code after the opening <body> tag.
5. Verify Installation: Once you've installed the code, confirm that it's working correctly by using the Preview and Debug mode.
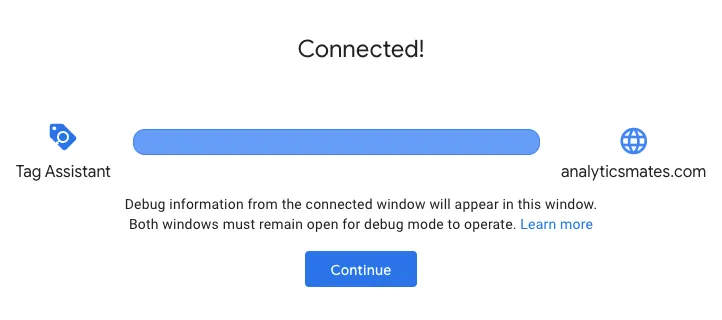
- In your workspace, click the “Preview” button.

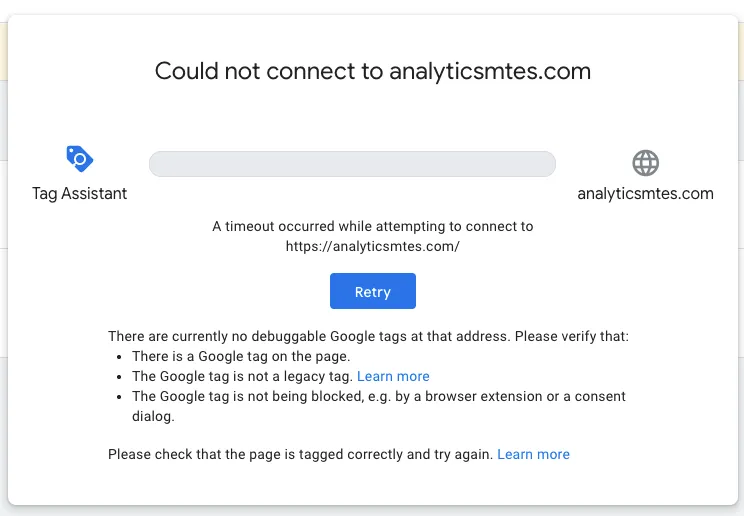
Enter your website address and click Connect:

- The installation is successful if the connection to the website has been established correctly.
- Or presented with this if the installation was not successful.
There are additional methods to verify your installation, but we won’t cover them here. Stay tuned for a dedicated blog post where we’ll explore this topic in greater detail.
If you’re still unsure about manually installing the code snippets and don’t feel comfortable with coding, don’t worry—there’s an alternative. This method works specifically if you’re using a Content Management System (CMS) like WordPress. While other CMS platforms may have their own instructions, we’ll guide you through the steps to install Google Tag Manager on WordPress.
Using a Content Management System (WordPress)
While this may not be the most conventional method, many business owners and marketers rely on a Content Management System (CMS) for their websites. In this case, we'll walk you through the process for WordPress, which is one of the most commonly used CMS platforms. However, it's important to note that the exact steps and plugins required may vary depending on the CMS you are using. Each CMS has its own set of integration procedures and plugin requirements, so be sure to follow the specific instructions to your platform.
Here are the steps:
1. Login to your Wordpress account
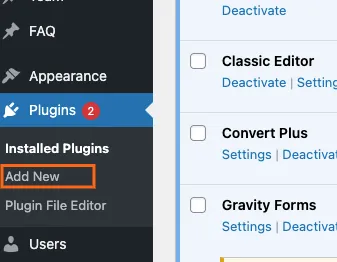
2. Go to Plugins → click Add new
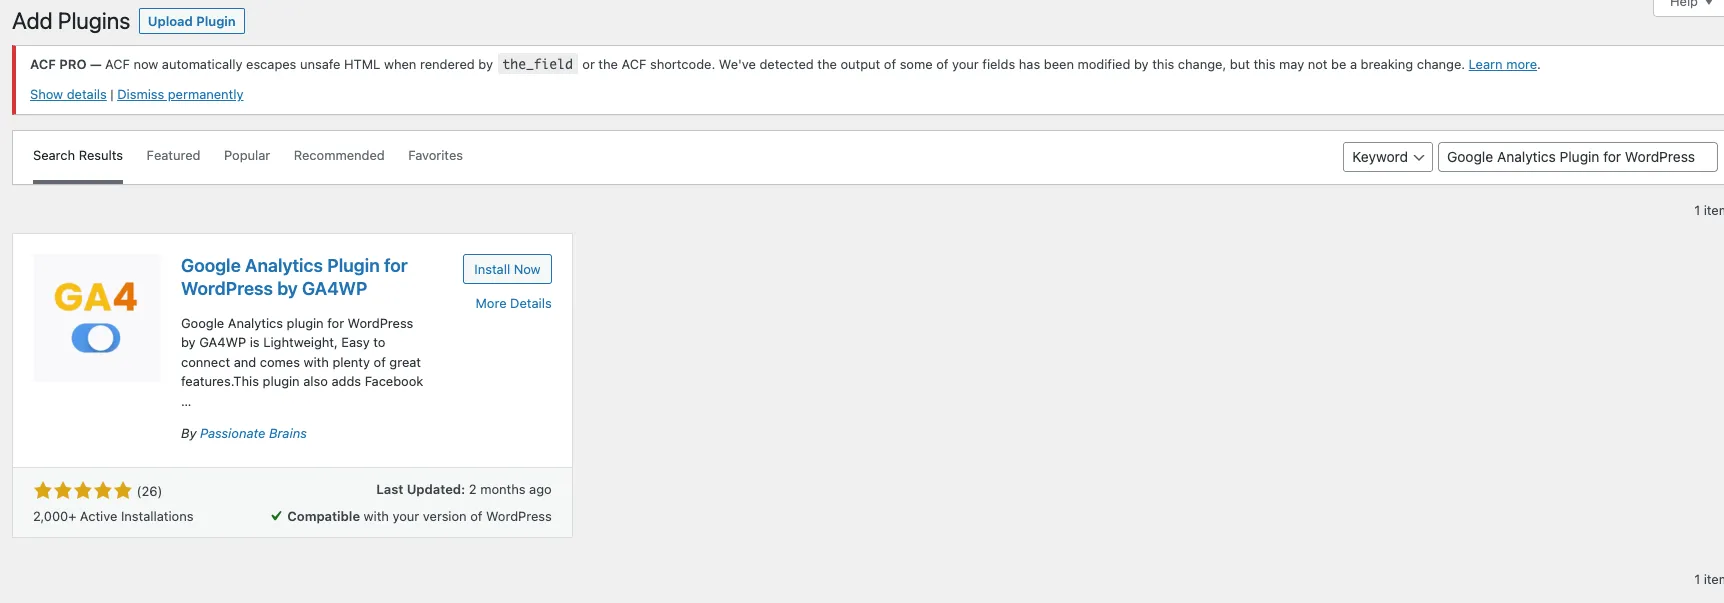
3. Search for this specific plugin: Google Analytics Plugin for WordPress by GA4WP. And click “Install Now”.
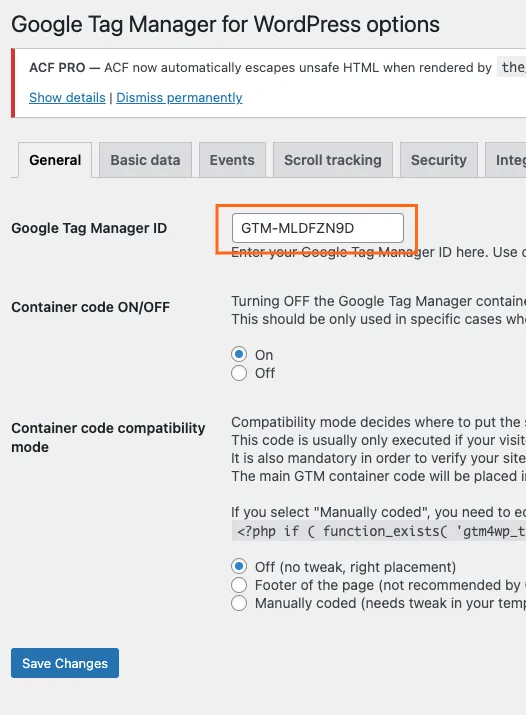
4. Once installed go to Plugins → Installed Plugins and look for the newly installed plugin – and click, Settings:

5. On this page, enter the GTM container ID (GTM-XXXXXX) and click Save.
That’s it! You can explore additional features and settings if you'd like, but make sure to test your integration first. This way, if any errors occur with the setup, it will be easier to revert any changes you made.
What’s Next
Implementing custom event tracking allows you to monitor specific elements on your website that are essential for understanding user behavior and interests. For instance, you might want to track interactions with a "Book a Free Consultation" button—an action that isn’t tracked by default in GA4. To capture this valuable data, you’ll need to set up custom tracking for these key events (previously referred to as conversions). This ensures you’re gathering insights that align with your business goals and user engagement strategies.
For a detailed guide on setting up key events or conversion tracking in GTM, check out our blog post: GA4 GTM Event Creation Techniques
FAQs
1. Can I use GTM with platforms like WordPress or Shopify?
Yes! Google Tag Manager integrates with popular Content Management Systems (CMS) like WordPress, Shopify, and others. Many CMS platforms have plugins or built-in tools to simplify the installation process.
2. What are the benefits of using GTM instead of adding tags manually?
GTM streamlines tag management, reduces dependency on developers, minimizes errors, and allows you to deploy updates faster. It also provides a centralized hub for all your tracking needs, making it easier to manage and scale.
3. Is Google Tag Manager free to use?
Yes, GTM is completely free to use, regardless of the size of your business or the complexity of your tracking setup.
4. What types of tags can I add using GTM?
GTM supports a wide range of tags, including Google Analytics, Google Ads, Facebook Pixel, custom HTML/JavaScript, and more. It also allows you to create custom events for tailored tracking needs.
5. What should I track with GTM?
You can track anything from page views and button clicks to form submissions and video interactions. The key is to focus on tracking actions that align with your business goals, such as conversions or user engagement.
6. Can I use GTM for mobile apps?
Yes, GTM supports tracking for both websites and mobile apps. You can integrate it with platforms like Firebase for mobile app tracking.
7. What should I do if my tags are not firing?
If your tags aren’t firing, use the GTM Preview and Debug mode to identify potential issues. Common problems include incorrect trigger settings, errors in tag configuration, or placement issues with the GTM container snippet.
8. Does GTM comply with GDPR and other privacy laws?
Yes, GTM can be configured to comply with GDPR and other privacy regulations. You can manage user consent settings and ensure that tags only fire when proper consent is given.
9. How often should I update my GTM setup?
Regularly review and update your GTM setup to ensure it aligns with your current tracking goals, website changes, and marketing campaigns. This helps maintain accurate and reliable data.
Final Words
While the core setup process for Google Tag Manager remains largely unchanged, our goal with this updated guide is to provide a more comprehensive, step-by-step approach. We want to ensure that the process is clearer and easier to follow, helping you implement GTM with confidence. By sharing practical tips and troubleshooting advice, we aim to make your GTM experience smoother and more efficient, regardless of your level of expertise.
If you need assistance, we’re here to help—feel free to book a free consultation with us.
We hope this updated step-by-step guide empowers you to make the most of Google Analytics 4 and helps your business thrive!
Thank you for reading!
We're always looking for ways to improve our Google Analytics 4 blog content. Please share your feedback so we can make it even better.


