


Venturing into the uncharted territory of Google Analytics 4 can be intimidating, especially when transitioning from the familiarity of Universal Analytics. It's common to feel uneasy about new things, often leading to a search for faults and a tendency to assign blame when difficulties arise. However, GA4 is not just a simple upgrade – it's a substantial transformation with advanced capabilities. So, let's help you push aside fear and dive into the world of GA4 together.
This article will provide you with instructions on initiating your journey with Google Analytics 4. You'll learn how to establish a GA4 property, create data streams, and effectively explore the platform's navigation.
Create GA4 Property
1. In Google Analytics, click Admin (lower left).
2. In the Account column, make sure that your desired account is selected. (If you only have one Google Analytics account, it's already selected.)
In Admin, look at the Account column to make sure that you've selected the right account. Then, in the Property column, click Create Property.
.webp)
3. Enter a name for the property (e.g. "My Business, Inc website") and select the reporting time zone and currency. If a visitor comes to your website on a Tuesday in their time zone, but it's Monday in your time zone, the visit is recorded as having occurred on Monday.
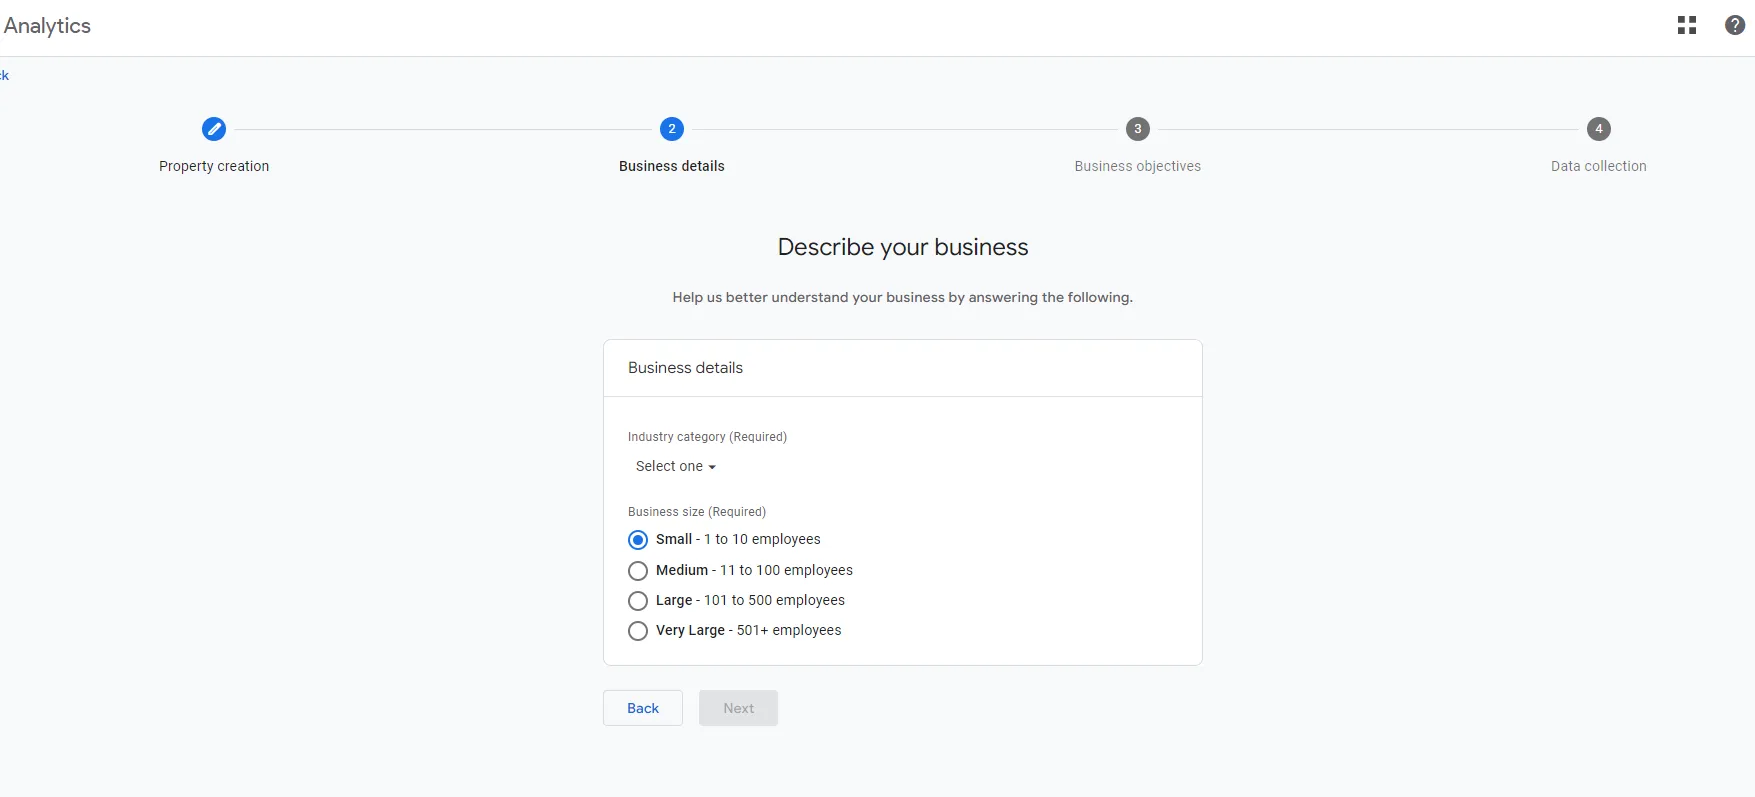
4. Click Next. Select your industry category and business size.

5. Select your industry category and business size.
6. Click Next. Select how you intend to use Google Analytics.
Note: Google Analytics tailors the set of default reports based on the information you provide about how you intend to use Analytics. For example, if you choose "Generate more leads," you will see a collection of reports to help you measure lead generation.
7. Click Create and (if you are setting up a new account) accept the Analytics Terms of Service and the Data Processing Amendment.
Data stream creation
1. In Admin, look at the Account column to make sure that you have your desired account selected. Then, look at the Property column to make sure that you have your desired property selected.
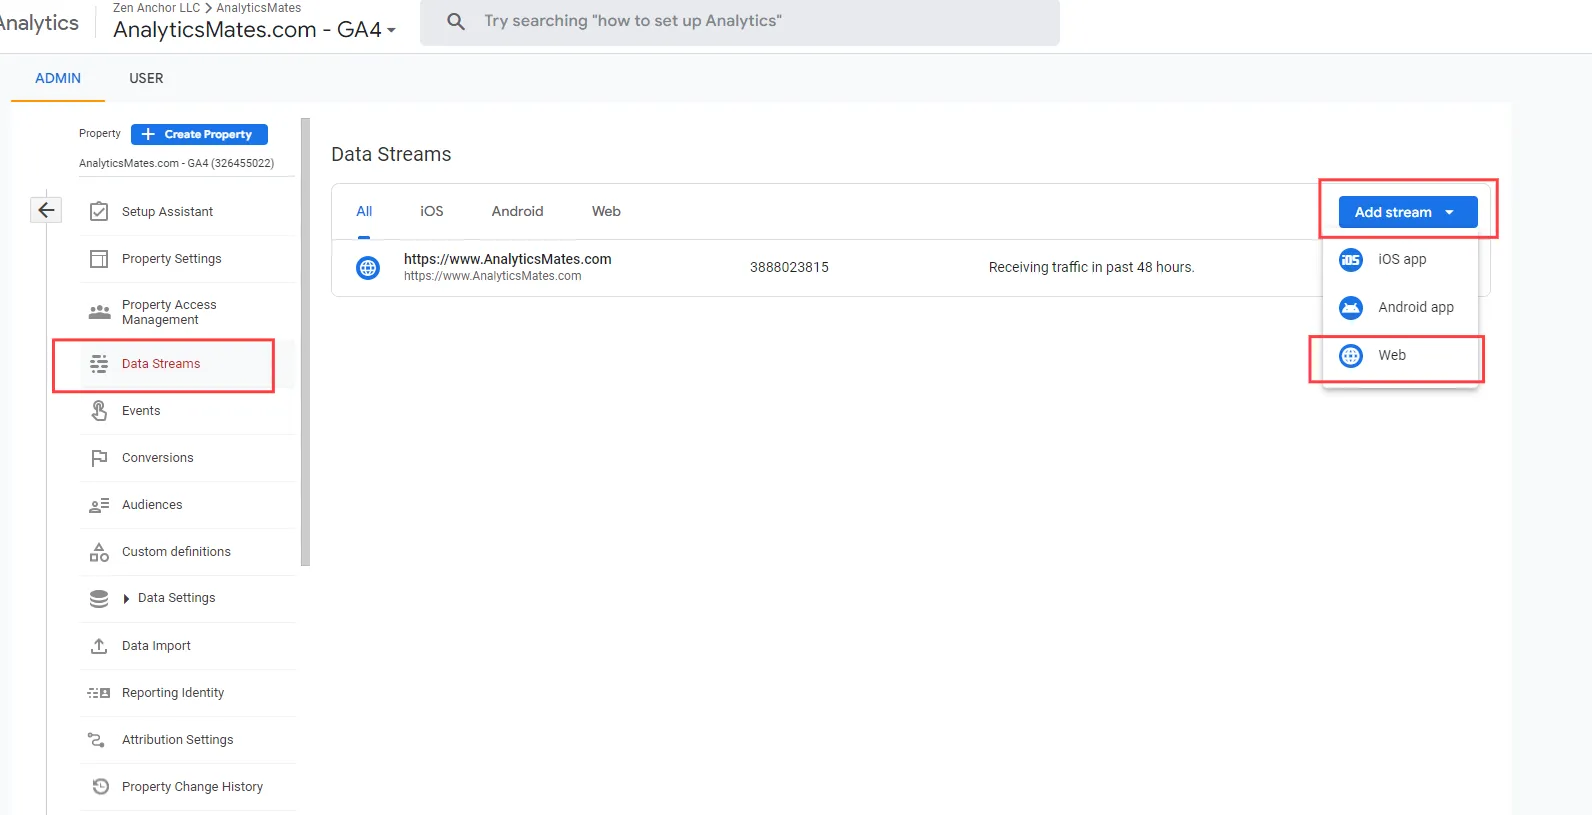
In the Property column, click Data Streams > Add stream.
2. Click iOS app, Android app, or Web. (For this presentation, I will focus on a Web stream. Select it.)
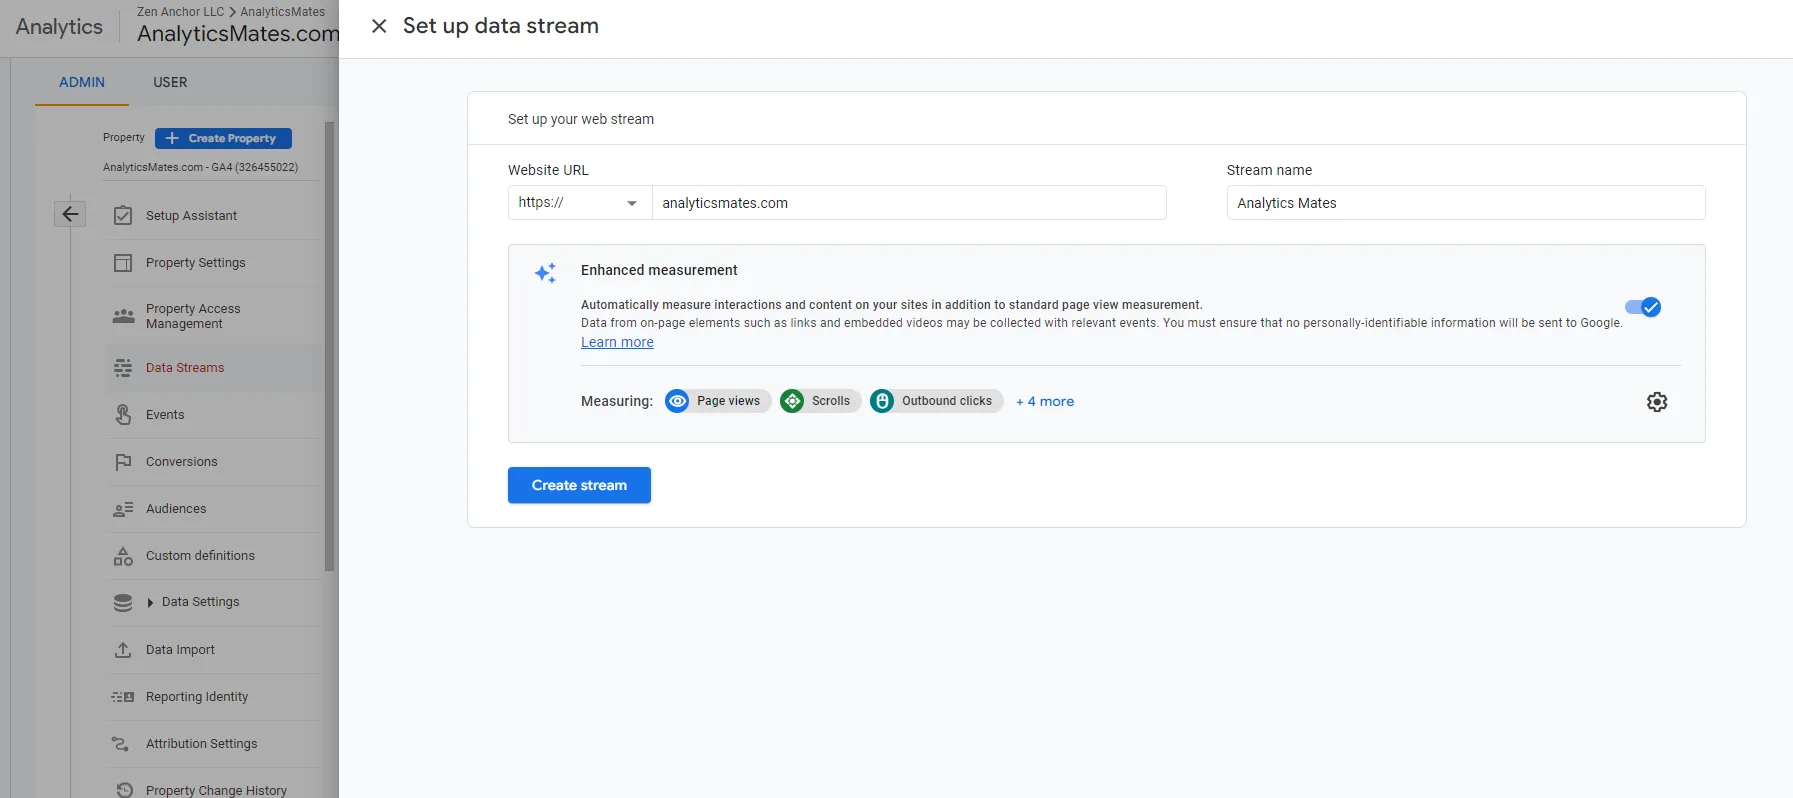
3. Then enter the URL of your website (for example, https://www.mywebsite.com). Note that the protocol (https) is already selected. After that, enter the name of your website.
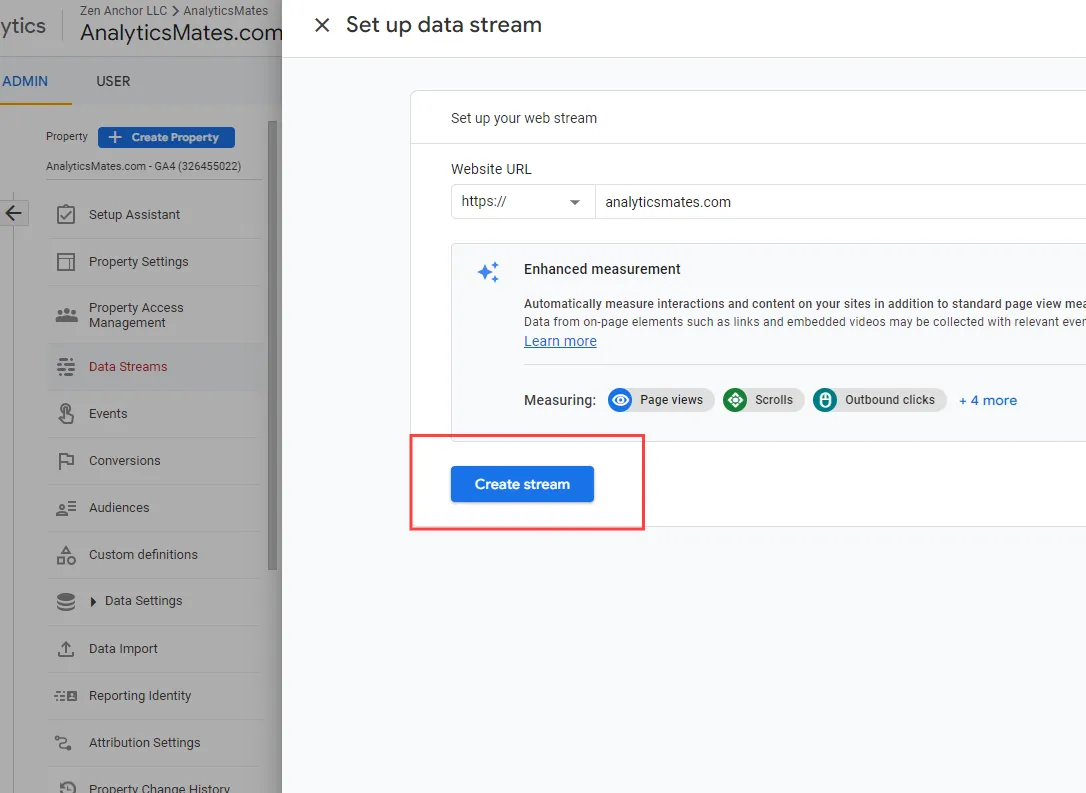
4. When you create a web data stream in Google Analytics 4, you can enable/disable Enhanced Measurement. It is designed to help marketers get as many events in the reports as possible without the need to cooperate with developers or configure them in Google Tag Manager.
By default, this feature is enabled and will automatically track the following events:
- Page view (event name: page_view)
- Scroll (event name: scroll)
- Outbound link click (event name: click with the parameter outbound: true)
- Site search (event name: view_search_results)
- Video Engagement (events: video_start, video_progress, video_complete)
- File Download (event name: file_download)
- Form events (form_start, form_submit)
- If you want, you can disable/enable events individually. You can do that by clicking the gear icon in the Enhanced Measurement section and then clicking the toggle buttons
5. When you’re ready, press the Create stream button.
Install via Google Tag Manager
If you want to have more flexibility and power in your hands with managing tracking codes, then installing the tracking via Google Tag Manager is an option you can use.
First, you must install GTM on your site (assuming that you already have GTM account).
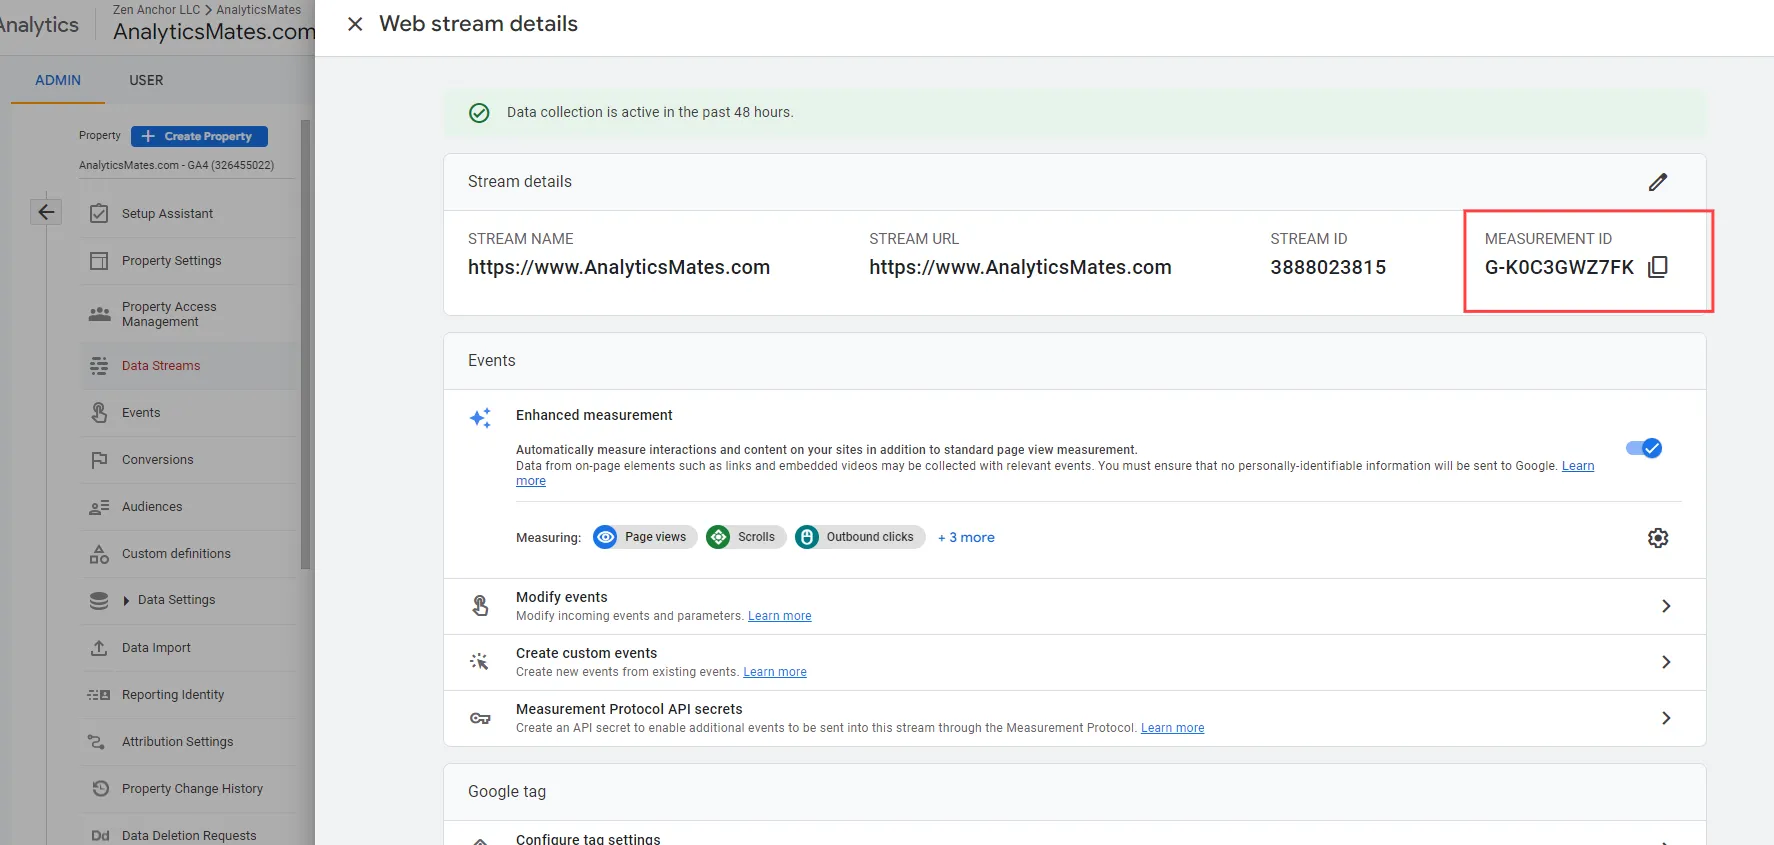
1. After that, go to GA4 > Admin > Data Streams, select your web data stream, and copy the measurement ID.
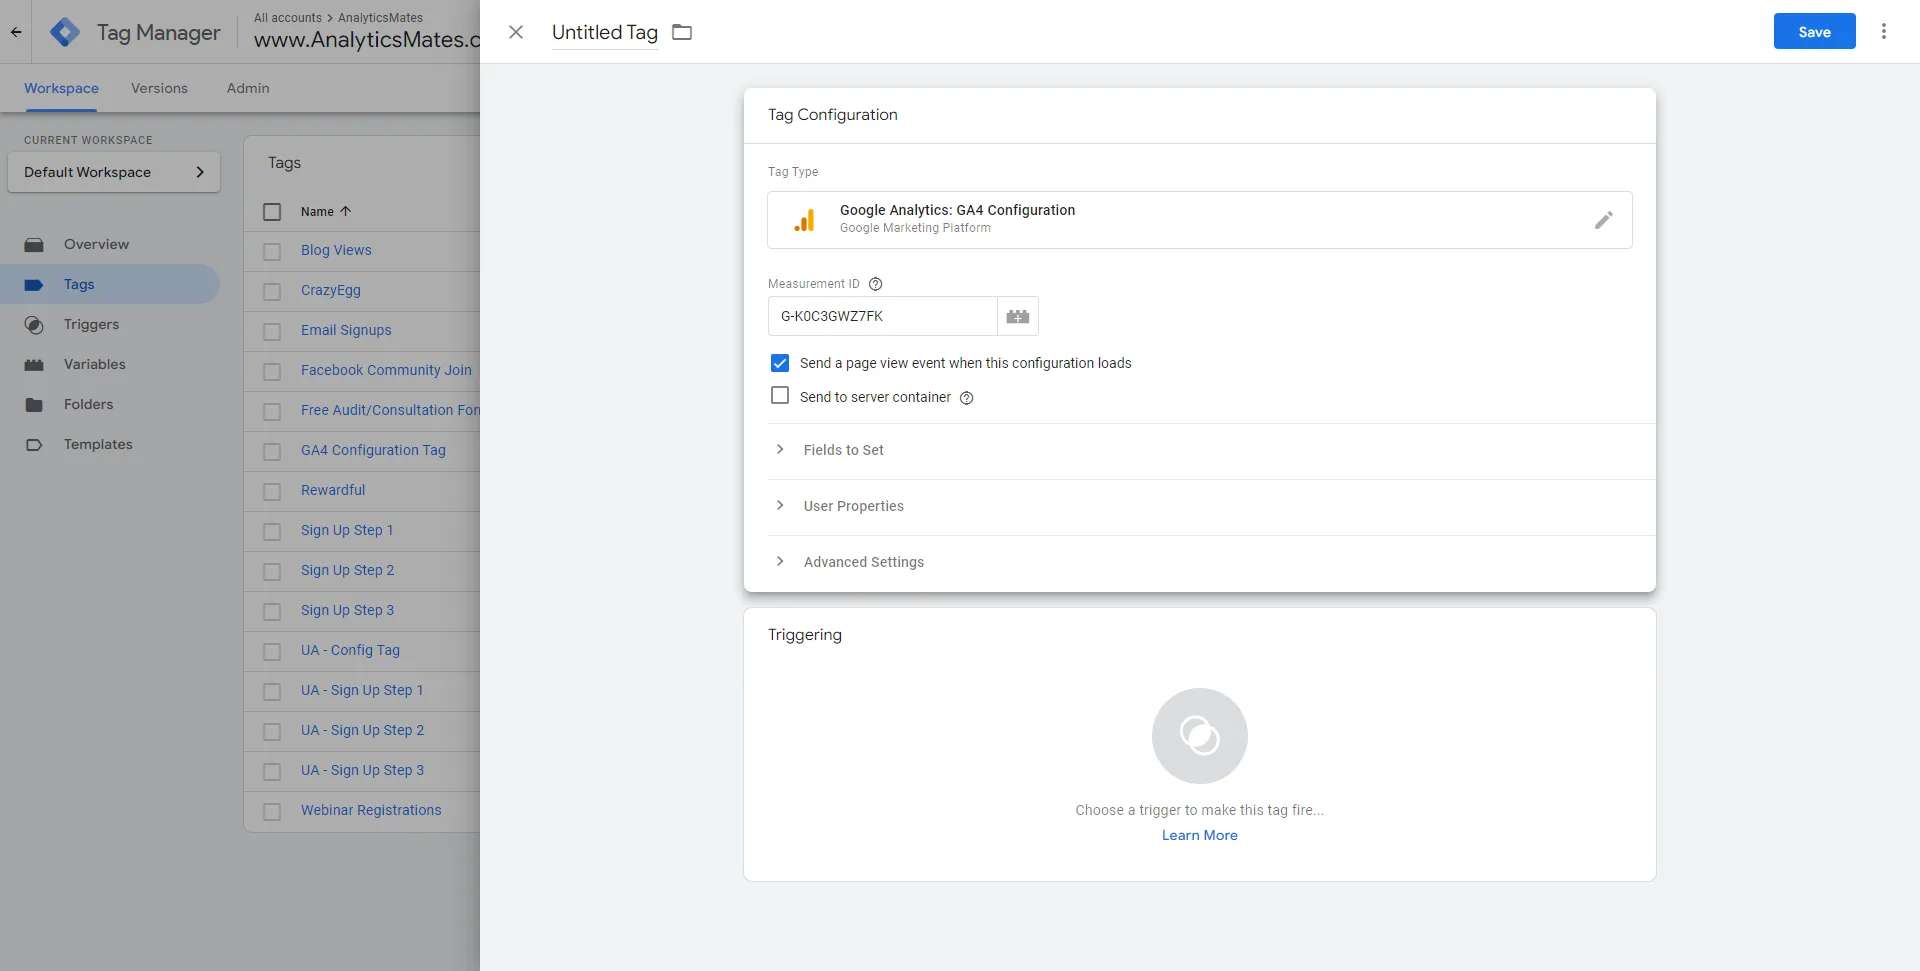
2. Then go to your Google Tag Manager container > Tags > New and choose GA4 configuration.
In the Measurement ID field, enter the ID you copied in the GA4 interface (Measurement ID: G-K0C3GWZ7FK).
In the Triggering section, select Initialization – All pages and then name the tag, e.g. GA4 – Pageview. Save the tag.
3. Then it’s time to test it. Click Preview in the top right corner of the GTM interface.
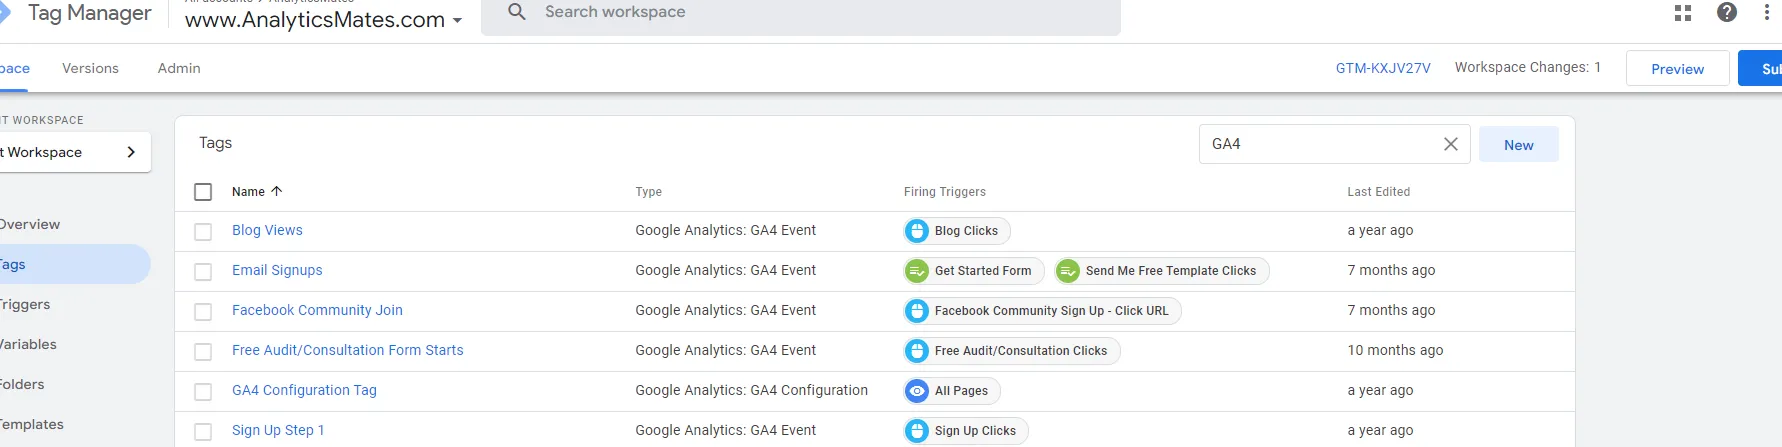
Once you enable the preview mode, you should see the new GA4 tag among the tags that fired.

4. This step is required only if you are using GTM to install GA4. Once you made sure that the data is coming in and it is displayed properly, you should submit your GA4 changes in the GTM container and publish it.
You can do that by clicking the SUBMIT button in the top right corner and then completing all the other steps that the user interface asks you to do.

After that, you should soon start seeing the new data coming in your real-time reports as well.
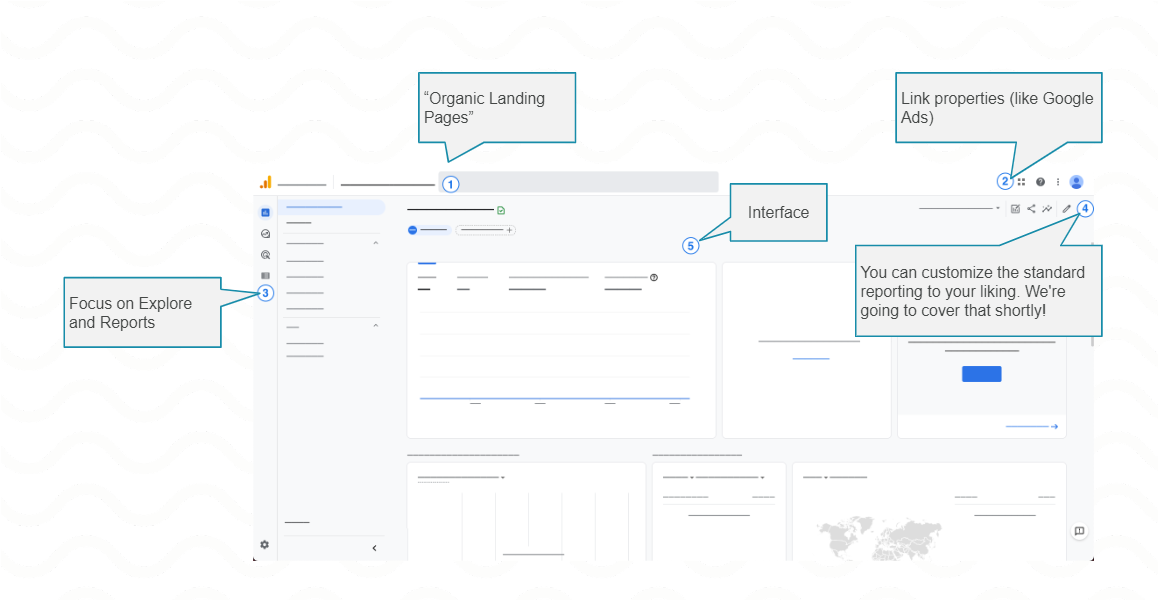
How to Navigate the GA4 Interface and Reports
- Search
- Product links, help, and account management
- Navigation
- Edit and share options
- Reports
Frequently asked questions
Can I use the same tracking code for multiple websites/apps in Google Analytics 4?
Answer: No, Google Analytics 4 uses a different tracking mechanism called the "Measurement ID" that is unique to each property. You'll need to generate a new Measurement ID for each website or app you want to track and integrate it into your website's code or app's SDK.
What is the purpose of the Measurement ID in a Google Analytics 4 data stream?
Answer: The Measurement ID is a unique identifier associated with each data stream. It's used to distinguish data collected from different sources within the same property. When you set up tracking on your website or app, you include the Measurement ID in the tracking code to ensure that the data is sent to the correct data stream in Google Analytics 4.
What events should I track using GTM and Google Analytics 4?
Answer: Google Analytics 4 focuses on tracking events and user interactions rather than traditional pageviews. Common events to track include pageviews, clicks on specific elements, form submissions, video views, and custom interactions. You can use GTM to define triggers that fire these events and send them to your GA4 property.
What are the next steps
"Switching to Google Analytics 4" is not only about the technical upgrade. It also means you need to learn more about this tool. GA4 is very different from its previous versions.
Here are some learning resources for you to continue the journey: In-depth settings to ensure your GA4 data collection is not compromise:
- Update Data Retention to 14 Months
- Turn off Automated UA Events
- Turn on Automated Filters - Filter Internal Traffic
Final word
In conclusion, starting with Google Analytics 4 might feel overwhelming, especially if you're used to Universal Analytics. New things can make us uneasy and quick to blame when things get tough. But remember, GA4 is not just an upgrade – it's a big change with lots of new features. We’ve given you the tools to begin your GA4 journey through this article. Keep coming with us as we explore more about this new platform. And remember that we're on this journey together.
We're always looking for ways to improve our Google Analytics 4 blog content. Please share your feedback so we can make it even better.
See Article Images


